Last blog I wrote about the financial challenge costuming can be and mentioned that I was going to do a series on inexpensive costuming. Here, in Part 1, I give you: the Simple Shirt.
What you’ll need:
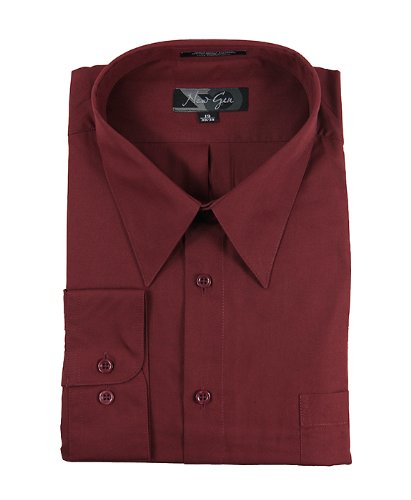
Thank you, amazon.com for the image
1. A collared dress shirt, preferably in a solid color that fits the time period (no neons or pastels). Look for black, white, off white, dark blue, red, dark purple, dark green, brown or dark grey. In my opinion those are the best color choices for immersion. For size I recommend you obtain one that’s too big for you. The look and feel of the day was far baggier than what we find comfortable by most modern standards. Also, a larger shirt is less restrictive when you’re sword fighting. Lucky for you, shirts like the one above can be found at almost every thrift store in existence as well as most garage sales, attics and the dusty backside of closets. Especially for the ladies: try to get one that hangs down to about mid-thigh or a little longer so that you can belt it without it constantly untucking itself from your movements.
Things to avoid: patterns and pockets. We’re going for simple and immersive here. Avoid polo shirts. They’re incredibly not time period and there’s really nothing you can do to make them immersive. Avoid stretchy materials. They’re hot and uncomfortable to wear over a full weekend of athletic activity.
2. A seam ripper.
3. A pencil
4. A decent pair of scissors.
5. A length of leather lacing. Here’s where the expense comes in. You’ll probably have to buy a roll of leather lacing from the craft section of Walmart or you’ll have to get it at your local craft store. You can also order them on the internet. A friend of mine opts for the boot laces instead of getting it on a roll like I do. Here’s what it looks like:
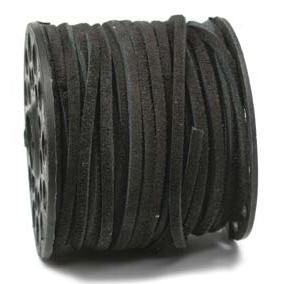
image courtesy of amazon.com
Here’s the Amazon link to this particular item because if you try to use the search bar you’re bound to wind up with all sorts of interesting pictures that you don’t necessarily want to see. http://www.amazon.com/Genuine-Split-Suede-Leather-Black/dp/B001NW2QQA/ref=sr_1_51?s=arts-crafts&ie=UTF8&qid=1369865718&sr=1-51&keywords=craft+leather I’m pretty pleasantly shocked by the price of this. In store prices are significantly higher.
Now that you have your materials together. Here’s what you want to do.
1. If you hate the way the collar looks (some collars are too skinny, some button down onto the shirt, or you’re like me and just hate collars in general), then use your scissors and cut it off.
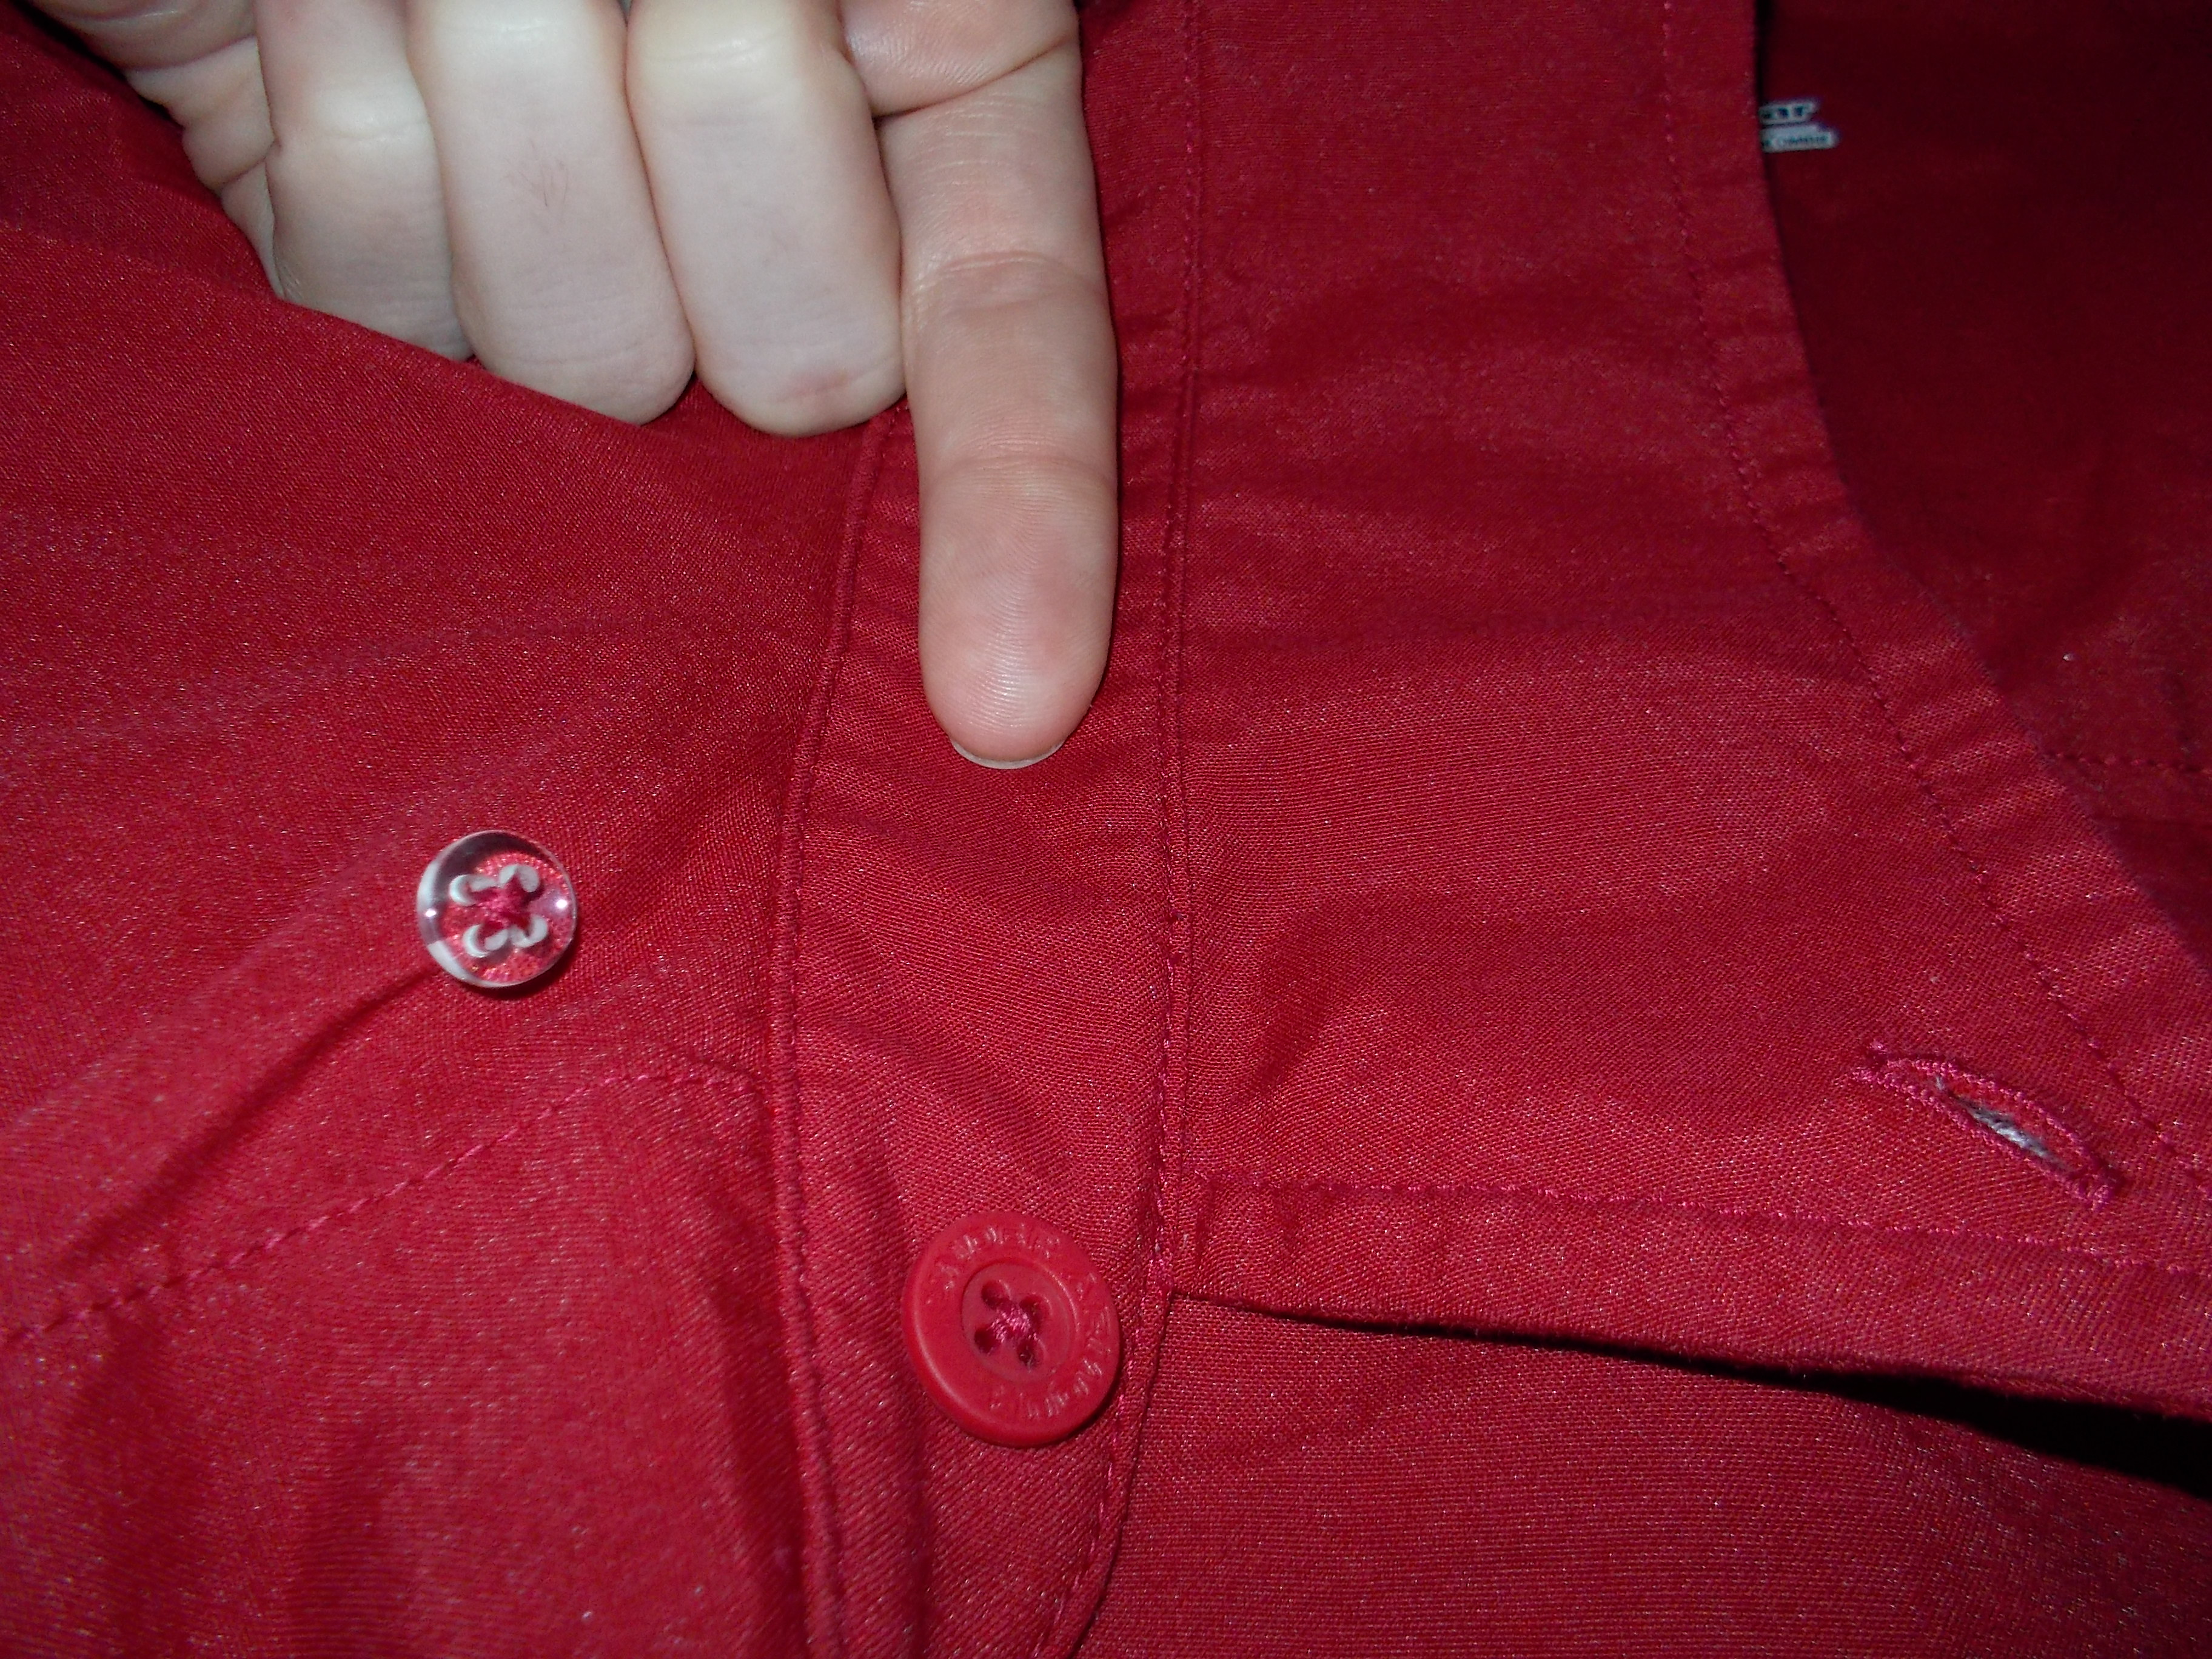
I recommend you keep the part my finger is on and cut to the right of the seam that is to the right of my finger. You’ll have what is called a “mandarin collar” left.
This shirt is by no means expected to last you 20 years, so I’m not going to have you “finish” any of it. Finishing work is meant to prevent the material from fraying and ripping, but it takes a knowledge of sewing that is beyond what this tutorial is designed for. The area where you cut the collar from might fray some, which in my opinion just adds authenticity to any adventurer’s outfit, but because you left the seam to the right of my finger intact it will not rip easily. If you’re playing an aristocratic or rich character, you might want to just find a shirt you like the collar on already.
2. Take your seam ripper and pop the buttons off the front of the shirt. You want to slide the inside of the curve under the button and gently, but firmly, push against the threads. The blade on the inside of the curve will slice through the threads and the button should pull free. Then pick out the threads and use your pencil to mark a spot on the shirt where the threads came from. Repeat until all the buttons are off the front of the shirt. (If your shirt had buttons to button down the collar, just take the buttons off and remove the threads. Don’t mark these with the pencil.)
3. Now you’ll be using the long pointy side of your seam ripper. Place that point on the mark you just made with your pencil and push the point through the fabric. Wiggle the seam ripper around until you’ve created a hole large enough to fit your leather lacing through. Do this for every pencil mark on the front of the shirt.
4. Starting at the bottom of your shirt, thread the leather lacing through the button holes and the holes you just ripped in the same way you would lace up your shoes.
Congratulations! You now have a Simple Shirt. If you don’t want to lace it up every time you put the shirt on, just pull the shirt over your head to wear it.
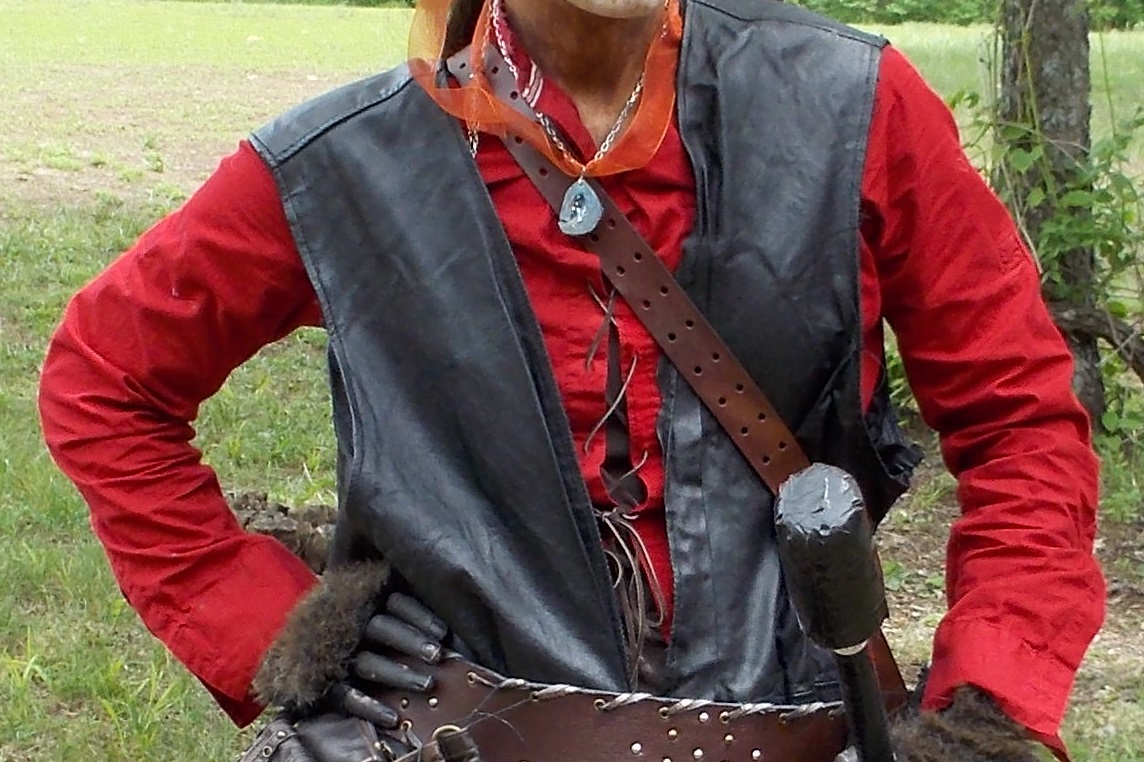
You’ll notice here that I lace my shirt down, not up, in order to avoid it getting caught on my armor. I also removed the buttons from my sleeve cuffs to give the sleeves a more open swashbuckling appearance.
SPECIAL NOTE: Most leather doesn’t react well to being washed, especially if it’s dyed to a color. I recommend you remove your lacing before you wash the shirt to avoid any dye seeping onto your costume or wrecking the lacing itself.
Some variations:
VarI: Go sleeveless! Cut the sleeves off the shirt with the scissors. Be sure you cut on the sleeve side of the shoulder seam to prevent the shirt from ridiculous fraying and potential ripping.
VarII: Using a T-shirt instead of a dress shirt is possible, but not as immersive. Cut the collar from the shirt with your scissors and cut a line straight down the center front to the desired depth. Most people prefer to end this cut just above the bottom of the pectoral muscles when the shirt is being worn. Use the seam ripper to create holes across from each other (like on a shoe) and lace the leather through. I highly recommend going sleeveless if using this method.
I’d love to hear from you if you try out this tutorial. Tell me how it went in the comments below!