You know the age old concept of looking forward to the weekend because you can spend the entire thing drunk and pretend you’re someone else? What if you could do it without the alcohol? Yup. I’m sure after my last post it won’t surprise you all that much, but I’m a role player.

photo by Dustin Bumgardner
Most people have never heard of role playing and it comes in many forms, so I’ll describe what I do. Improvisational theater is where you have no memorized lines and only a vague idea of what the story is. You know who you are and where you are and that’s just about it. This is usually done in a class to enhance your acting or public speaking skills, but some of us have made it into wonderfully long events where you get to go to a campsite or park somewhere with 30-100 of your fellows and dress in full costume as your character to do improvisational theater for as long as the event lasts. And (my favorite part) your character gets to keep coming back to that same world with those same people for as long as you choose to attend the events! It’s like a video game, but you’re actually playing your character physically instead of pushing buttons.
Why would you do this? Because it’s fun. Because you get to enter a world that you wish you’d grown up in where there are dragons, faeries, talking cats, majestic lion folk, wise elves and staunch dwarves. In our land there is an evil queen who gained her station by poisoning her husband, who wasn’t much better than herself (or so we heard). Magic things can happen and grotesque creatures abound. There are puzzles to solve and people with their own agendas and battles to be fought with foam covered plumbing supplies. Who wouldn’t want to try it just once?
If high fantasy isn’t your thing, there’s also the post-apocalyptic version: Aftermath, the post-apocalyptic version with zombies (because who doesn’t love a good zombie game?): Dystopia Rising, or you can do the vampire version: Vampire: the Masquerade.
My particular flavor is Heroic. We have a chapter that’s based right here in the DFW area, an amazing support staff that handles writing all the plotlines, keeping track of all our characters as they grow, feeding us at weekend events, taking pictures of our incredibly awesome costumes and epic battles, marketing us to bring in new players, someone to make sure there are people there to play the monsters we fight against and there’s even a team that helps new players build their characters, make their costumes and teach them how to play! Last weekend this young chapter had its very first weekend long event at which I was privileged enough to be their tavern bard. We had a great time and I’m looking forward to our next full weekend event in May.
That brings me to a special passion of mine: costuming! The more you read on this site, the more costumes and costuming ideas you’ll find that have been produced and tested by yours truly! When it comes to creating that perfect phys rep (physical representation of something necessary to play the game) you just can’t shut me up! And my husband is right in those trenches with me. Last night he spent about 6 hours coffee dying paper for a new spell book.
So today I wanted to present to you one of my latest creations that I was particularly proud to have accomplished. It’s fairly inexpensive, easy to wear and so incredibly necessary to most fantasy/medieval costuming. Let’s talk about ARMOR!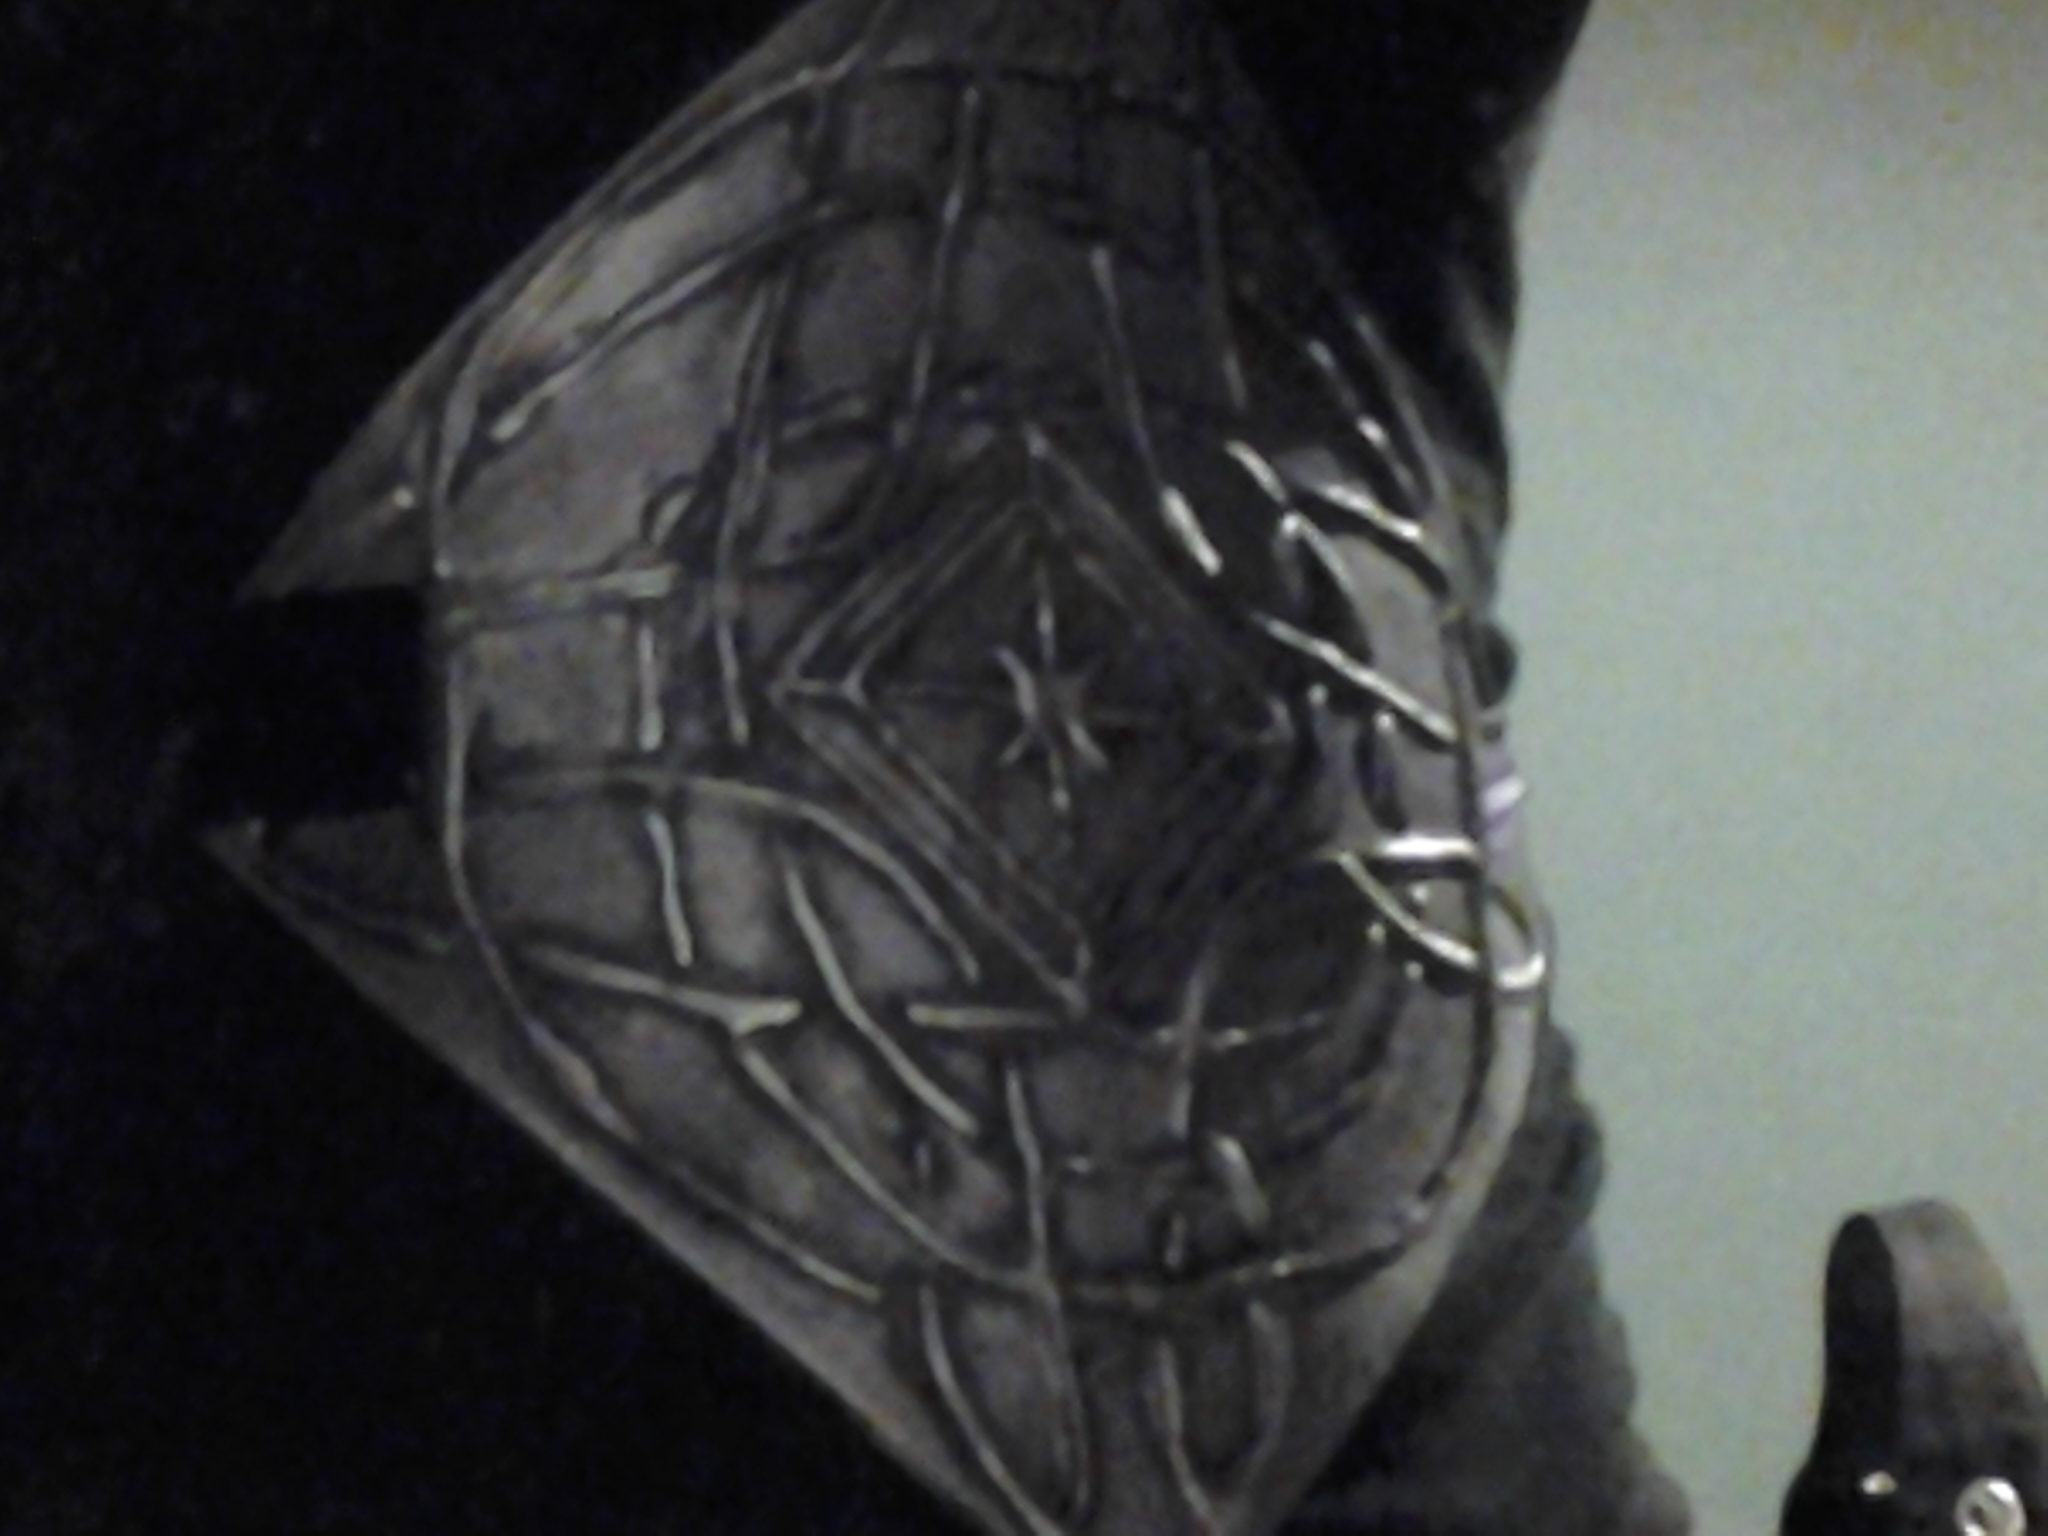
At any given live action role play (LARP), interactive theater doing fantasy/medieval and even some Halloween parties you’re bound to find many different levels of awesomeness in armor. Some things are period replica and can be ordered online. These pieces are made of metal and are often quite heavy. My friend’s full suit, which is quite impressive, weighs about 80lbs! Others make their own armor that ranges in the 10-30lb range, like my husband’s suit made from roof flashing. But I’m a girl and I have womanly curves that aren’t accommodated by unyielding yet shapable earth. I also have no desire to be running around the park (literally) with that much weight pulling down on my shoulders. Then my husband presented to me the idea of foam armor.
In many games your armor must LOOK like metal. That doesn’t mean it must be made of metal. So if you’re willing to break out the glue gun and some paint, anyone can recreate a very attractive piece that will fool the untrained eye in a jiffy!
Here’s what you’ll need:
2 sheets of art foam (that stuff you used in kindergarten- sold at most craft stores and in the children’s craft section at Walmart in 8.5×11 sheets)
Hot glue gun with glue sticks (kids, let mom and dad help you with this part. This glue is HOT)
Spray adhesive (I use Locktite)
Scissors
A ribbon or belt to hold it on
Exacto knife or box cutter (again, kids, let mom and dad help you with this. Blood isn’t very attractive on the finished product)
paintbrush or sponge
old rag
acrylic metallic paint in the color of your choice
acrylic black paint (for antiquing, optional if you don’t want shiny armor)
spray shellac, optional
Here’s how it’s done:
1. bond the two sheets of foam together with a permanent bond per the instructions on the can. Let it dry overnight. I recommend doing this in the garage or outside somewhere because of the smell and sometimes the spray adhesive drifts off your project a little. Wouldn’t want sticky glue on Mom’s carpet.
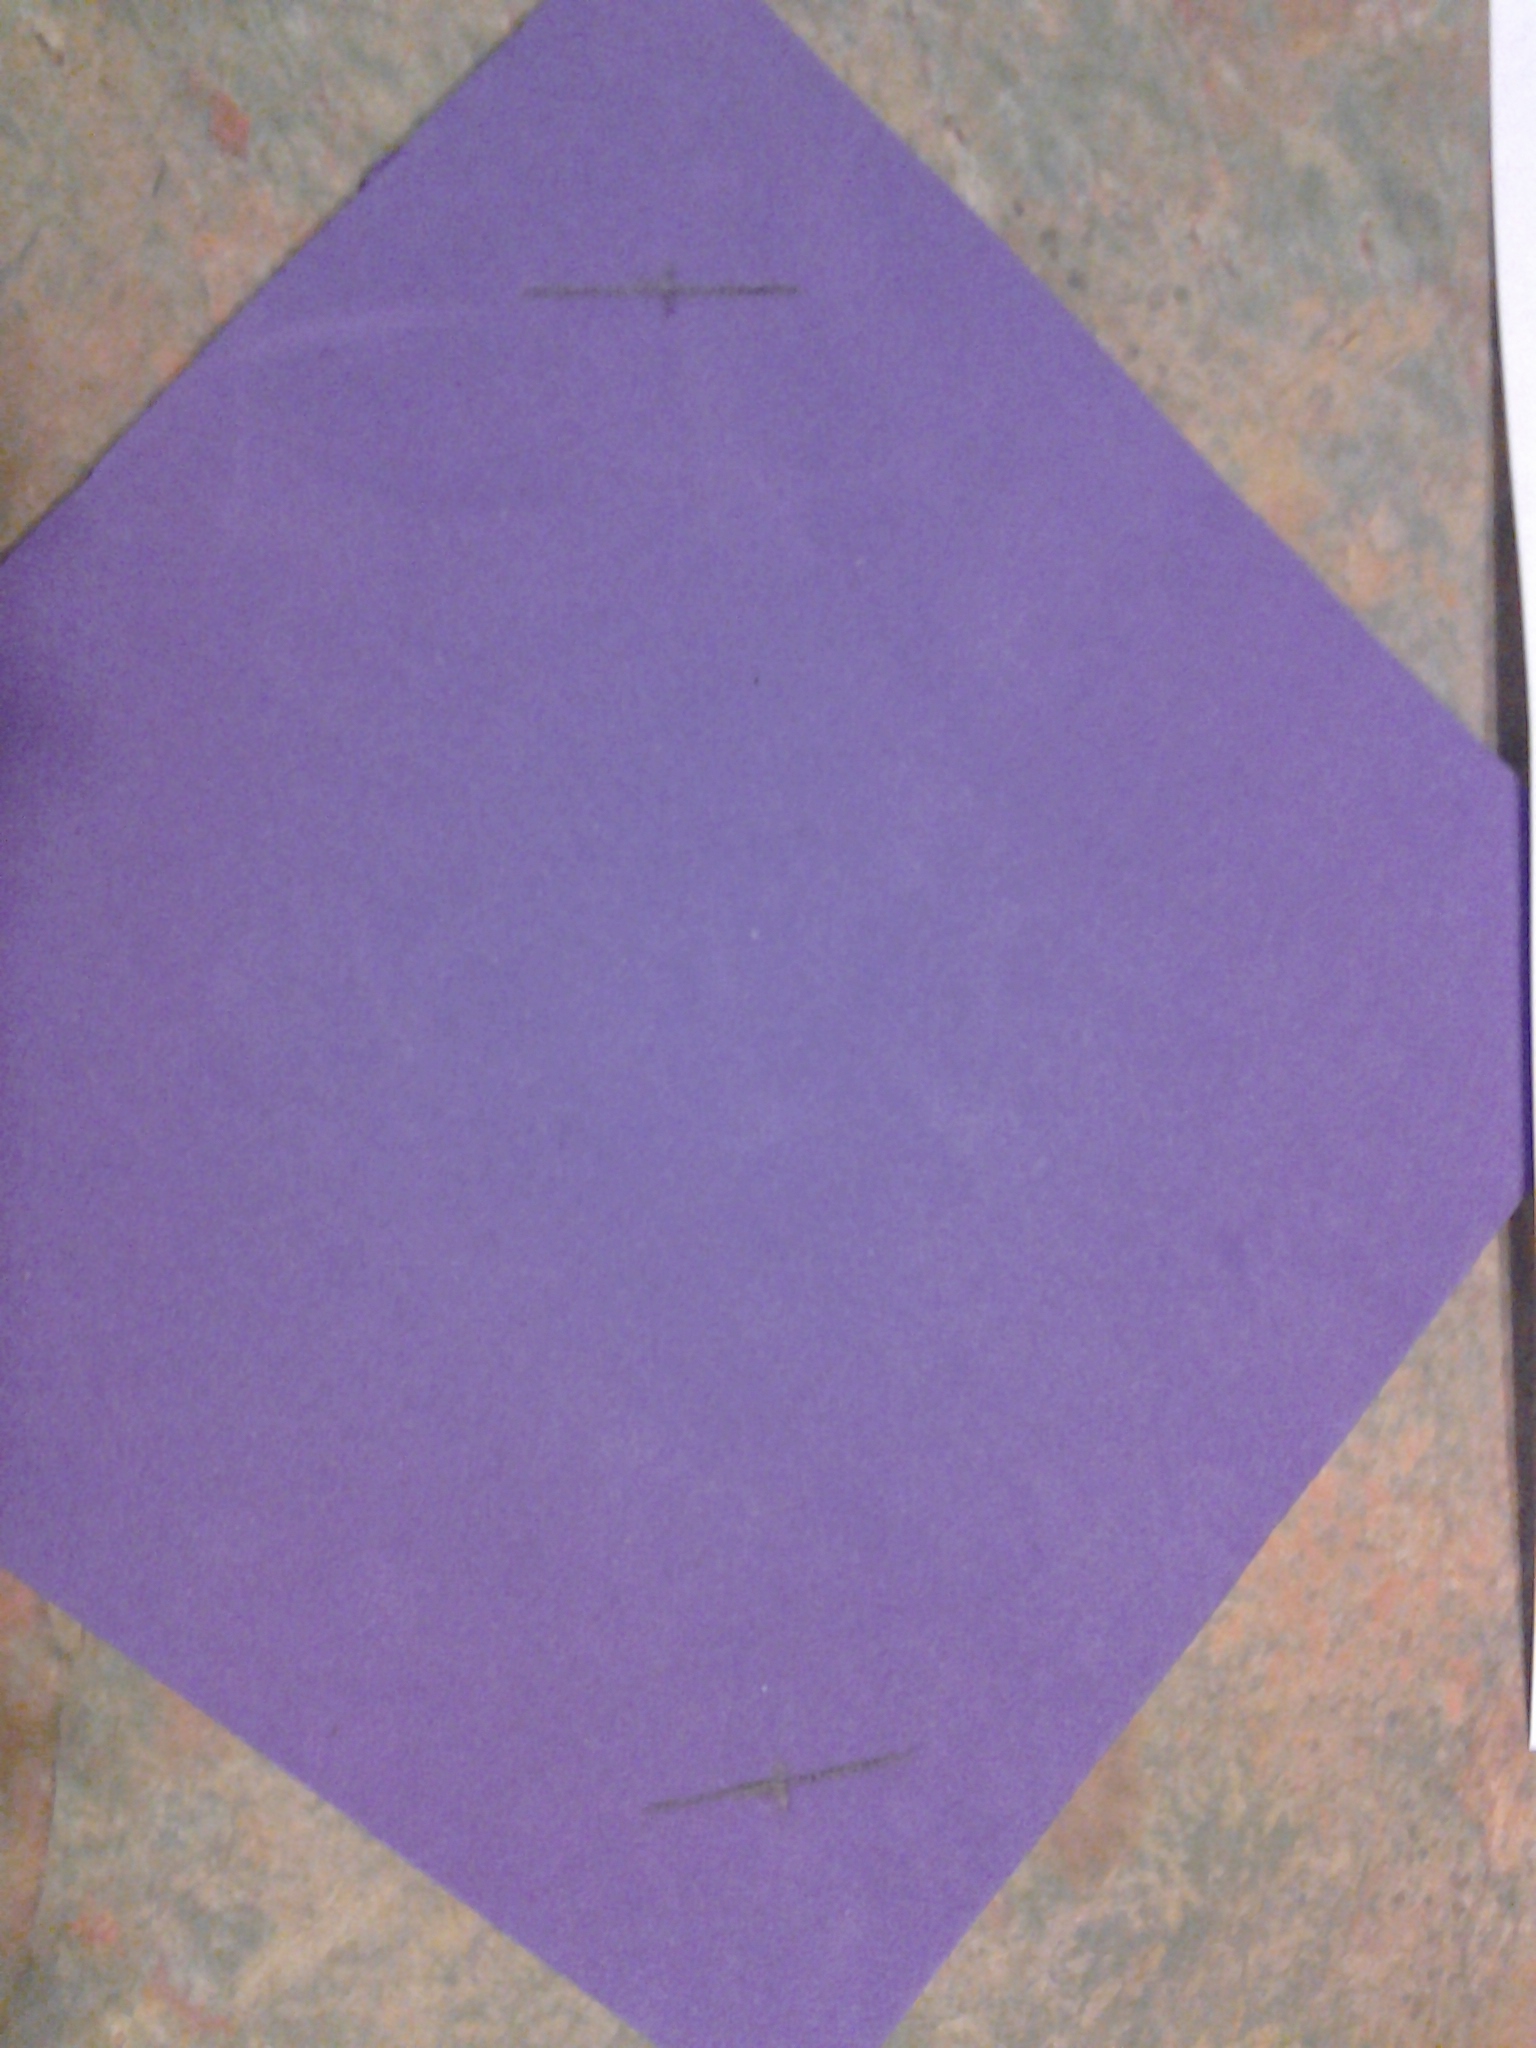
2. Cut the bonded foam into a square. It should end up 8.5in by 8.5in.

3. Mark with a pencil the place where your ribbon will go through. Make sure it’s wide enough to accommodate the ribbon or belt and that it’s the same distance from the edge on both sides. Mine is 2in from the points.
4. Use the Exacto knife or the box cutters to cut slits where your pencil lines are. (Let an adult handle this part, kids.)
5. Pencil in the pattern you’d like to have as the raised portion of the armor. Then carefully hot glue over your pencil lines. Don’t worry, the pencil won’t show once you’ve painted the finished piece. (This is a part to have an adult help you with, kids.)
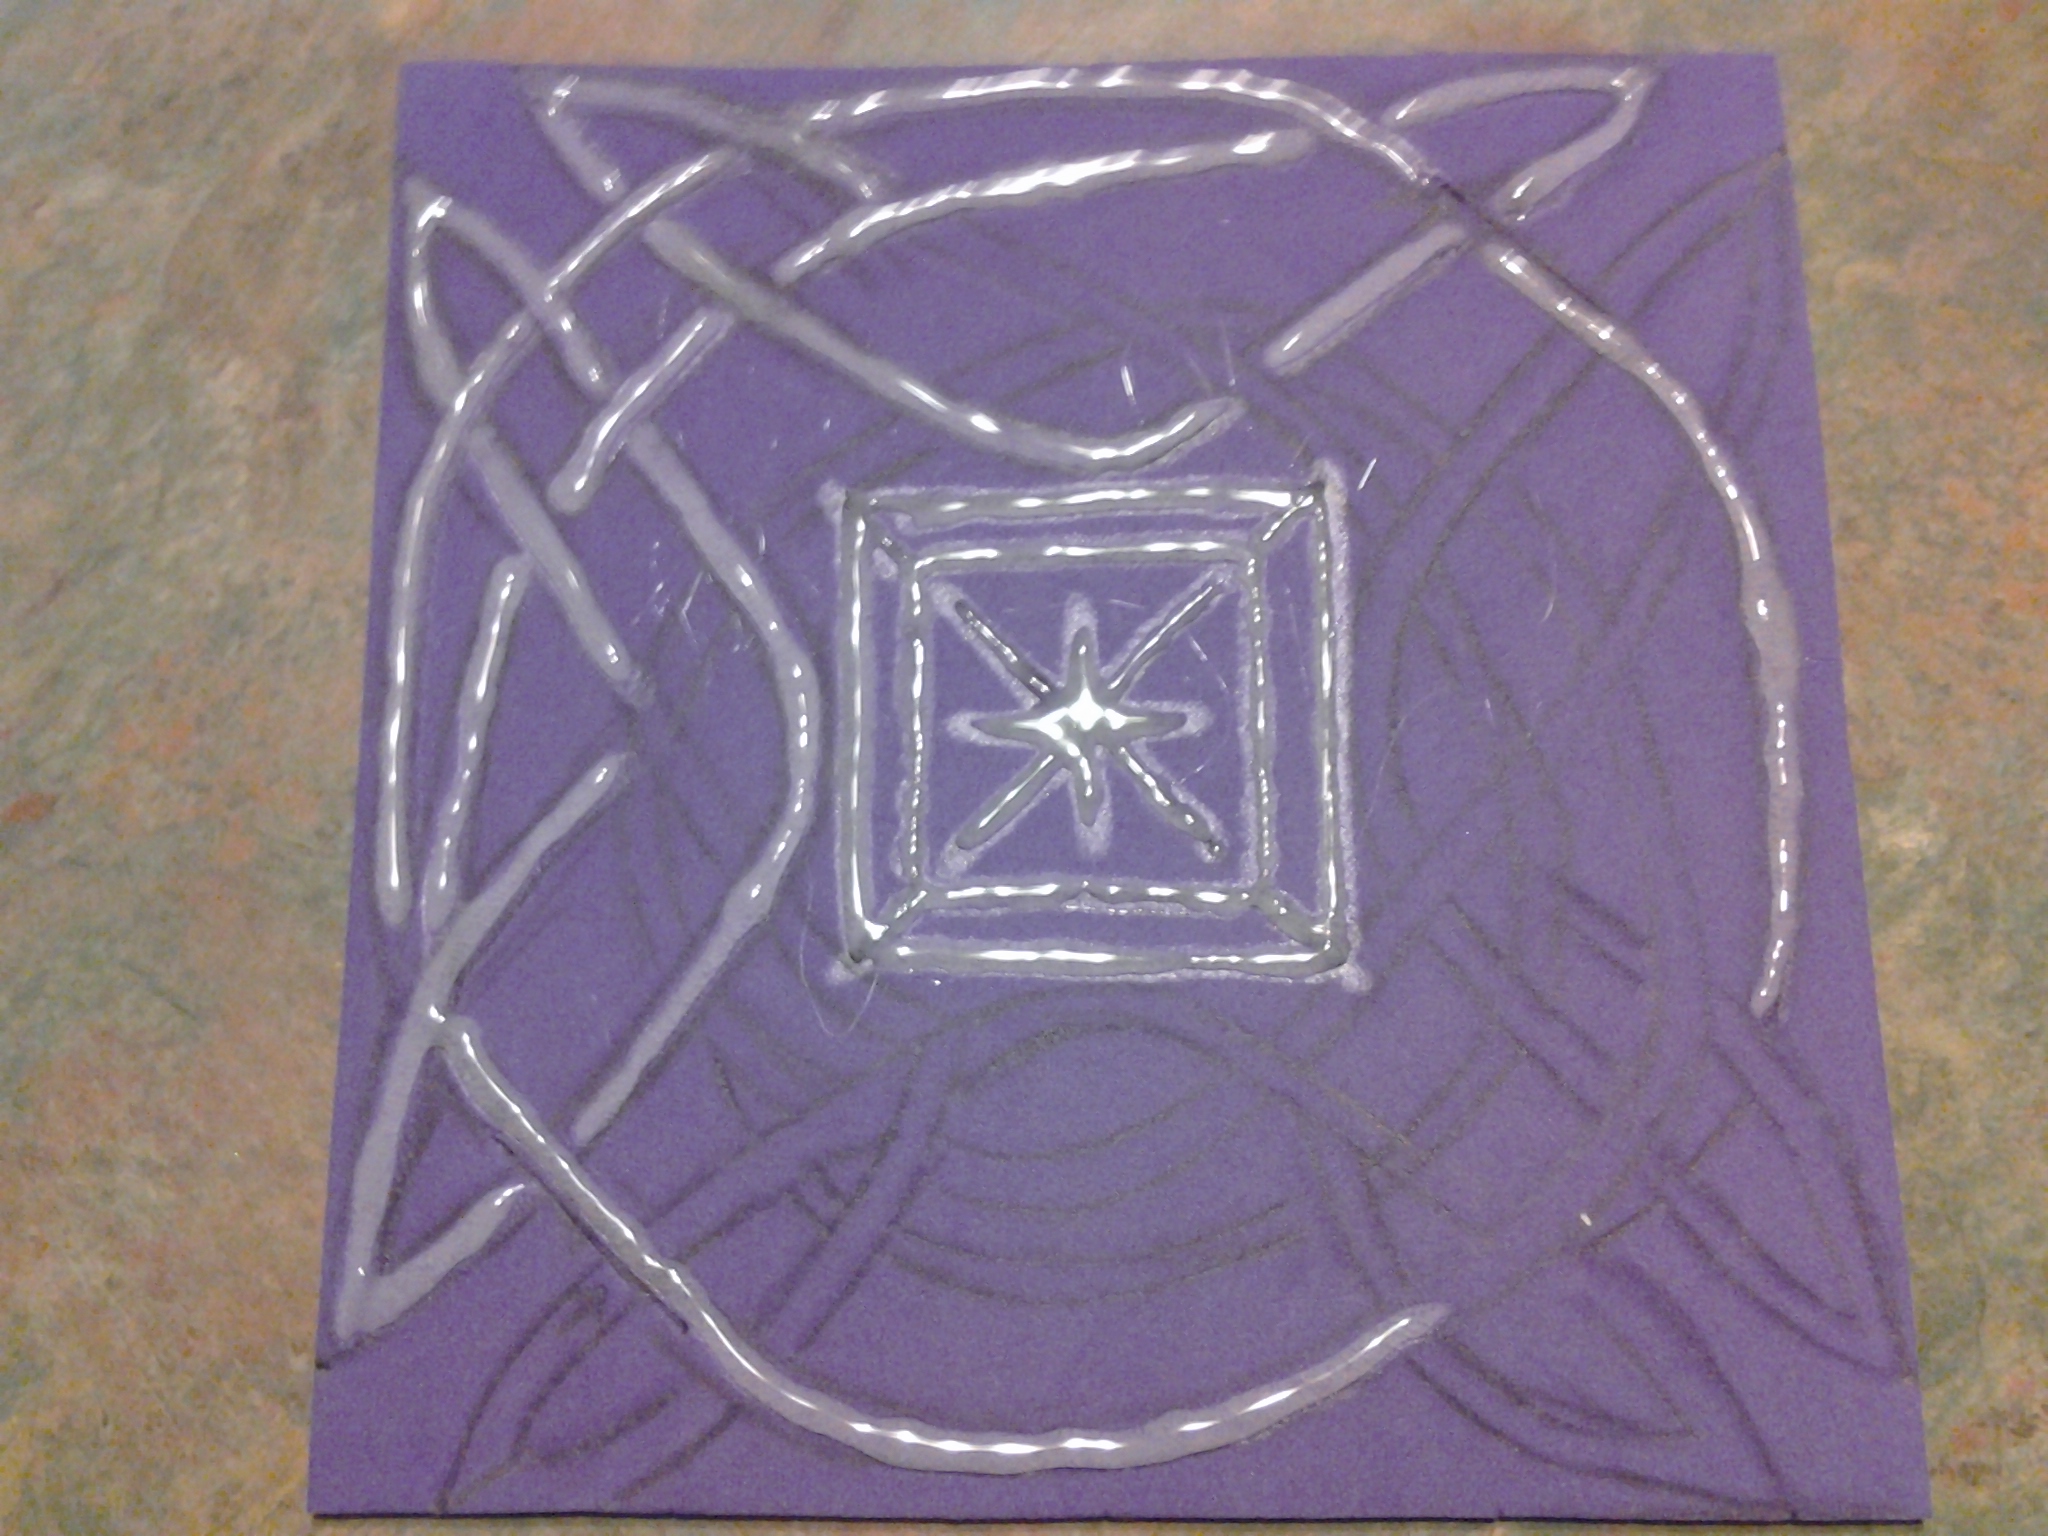
6. Let your glue dry. It doesn’t take very long. Have a snack!
7. Once the hot glue has dried, remove the little spider webs the glue gun leaves behind so you just have the design you wanted without all the little strings.

8. Next, use your brush or sponge to coat the top and edges of the whole thing in your metallic paint. Wait for this to dry. You might need to repeat once or twice to get a good coverage so the color of your foam doesn’t show through. Be generous with the paint and make sure it gets into all the little nooks and crannies!
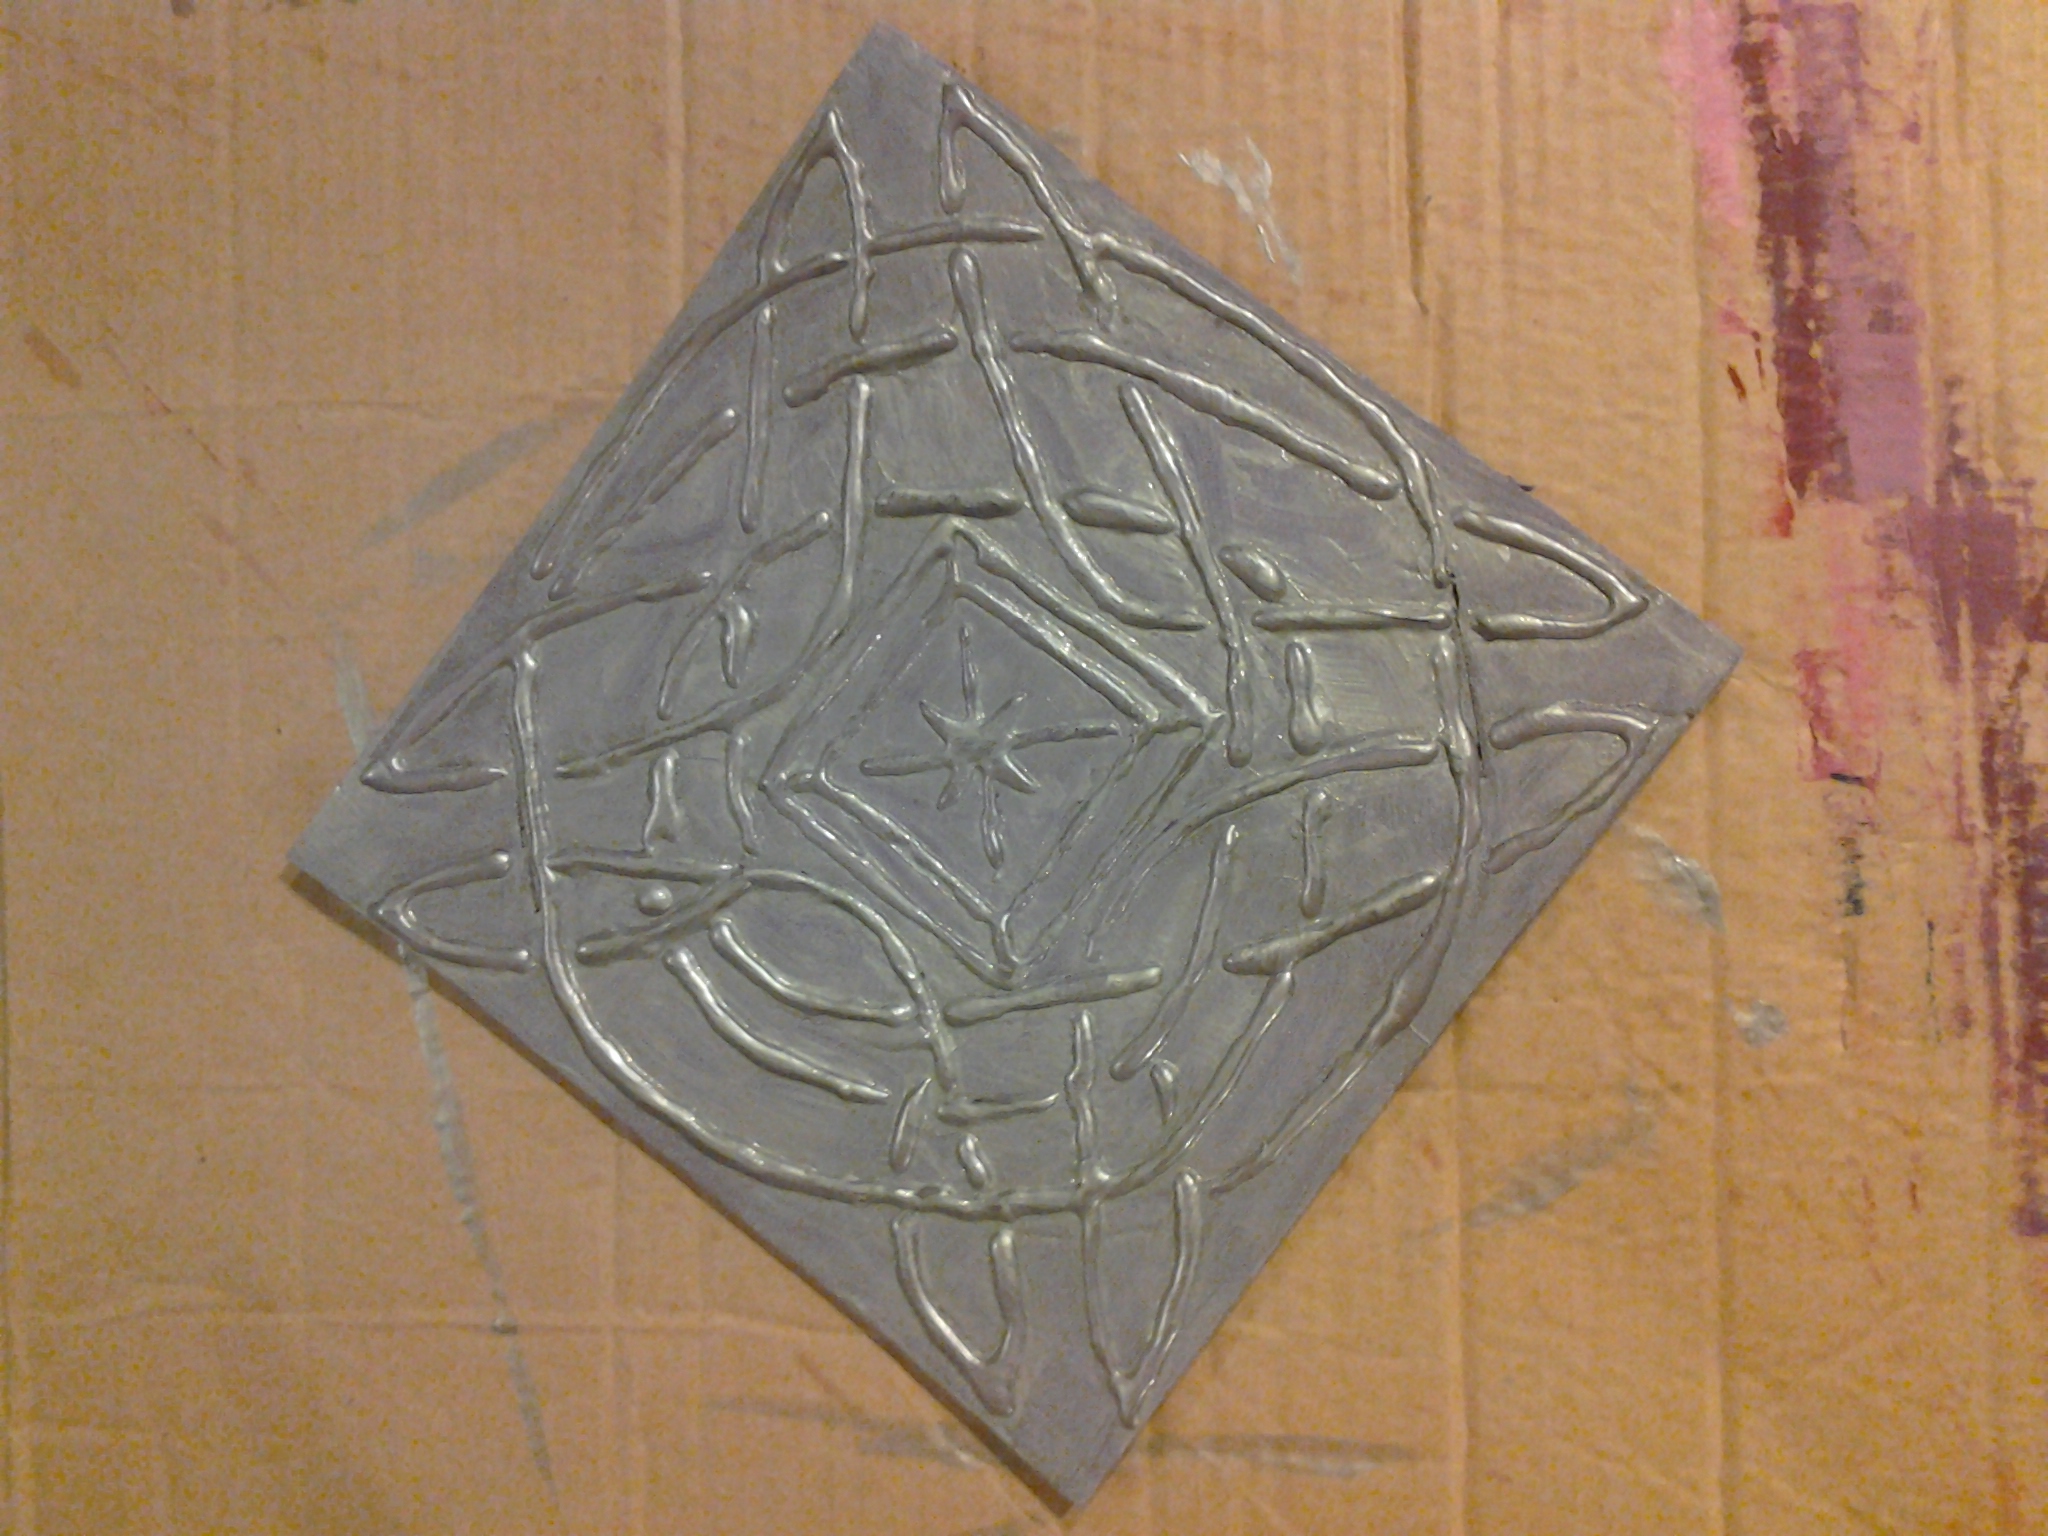
9. When the metallic paint has dried (about 10-15min), cover the whole front and sides again in black paint. Again, be generous so all the little nooks and crannies are filled. Then immediately go back over the black with a rag and wipe as much of it as you can off. This leaves black in some spots, but not all, which gives the armor an aged look.
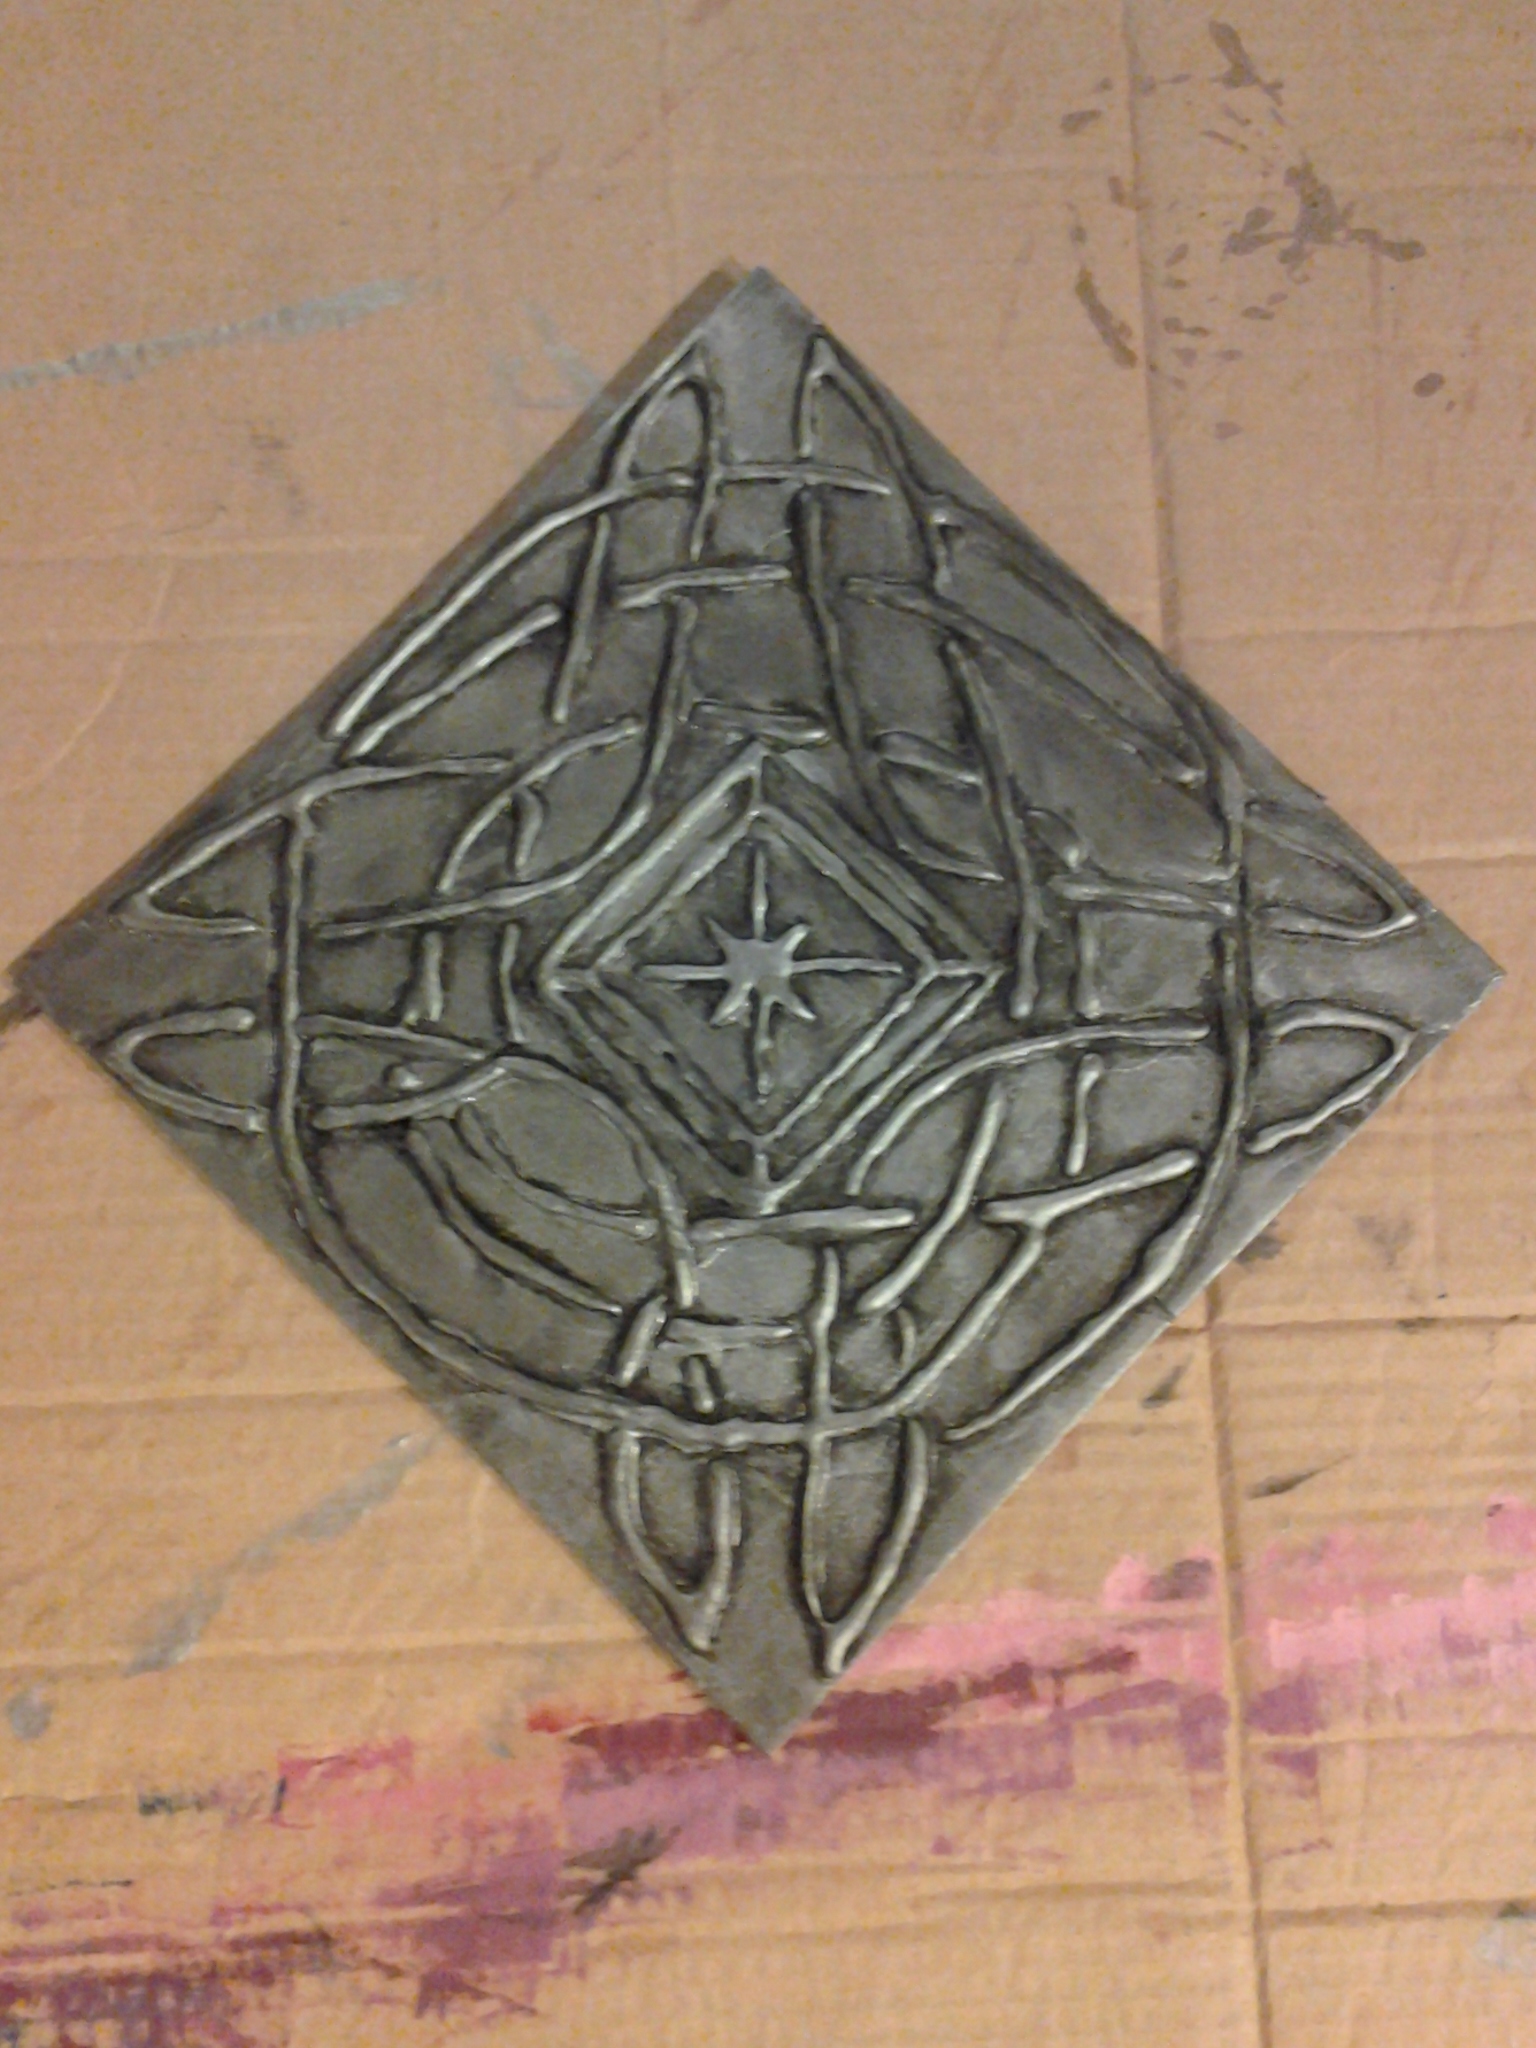
10. If the armor looks too dark (like the black stuck to it too much and you want lighter colored armor) lightly go back over the front with the metallic paint. DO NOT try to jam the color in the corners and crannies this time. We’re just trying to hilight the high spots and the middles of the wide open spaces.
11. Allow the paint to dry completely. Then spray the shellac and let it dry according to the instructions if you’re concerned about making sure the color is water proof. You can also decoupage the piece, but keep in mind this will make the piece stiff and inflexible so you’ll have to dry it against you (which is uncomfortable to say the least). I didn’t seal mine with anything. I wasn’t that worried about it.
12. When the paint is completely dry you might want to flip the piece over and do a metallic base coat on the back of it just in case the back accidentally shows when you bend over or something. Since I was playing the lap harp while wearing mine, there were definitely times when one of my points bent far enough for people to see the back.
13. Thread your ribbon or belt through the slits you cut in the foam earlier and put it on!
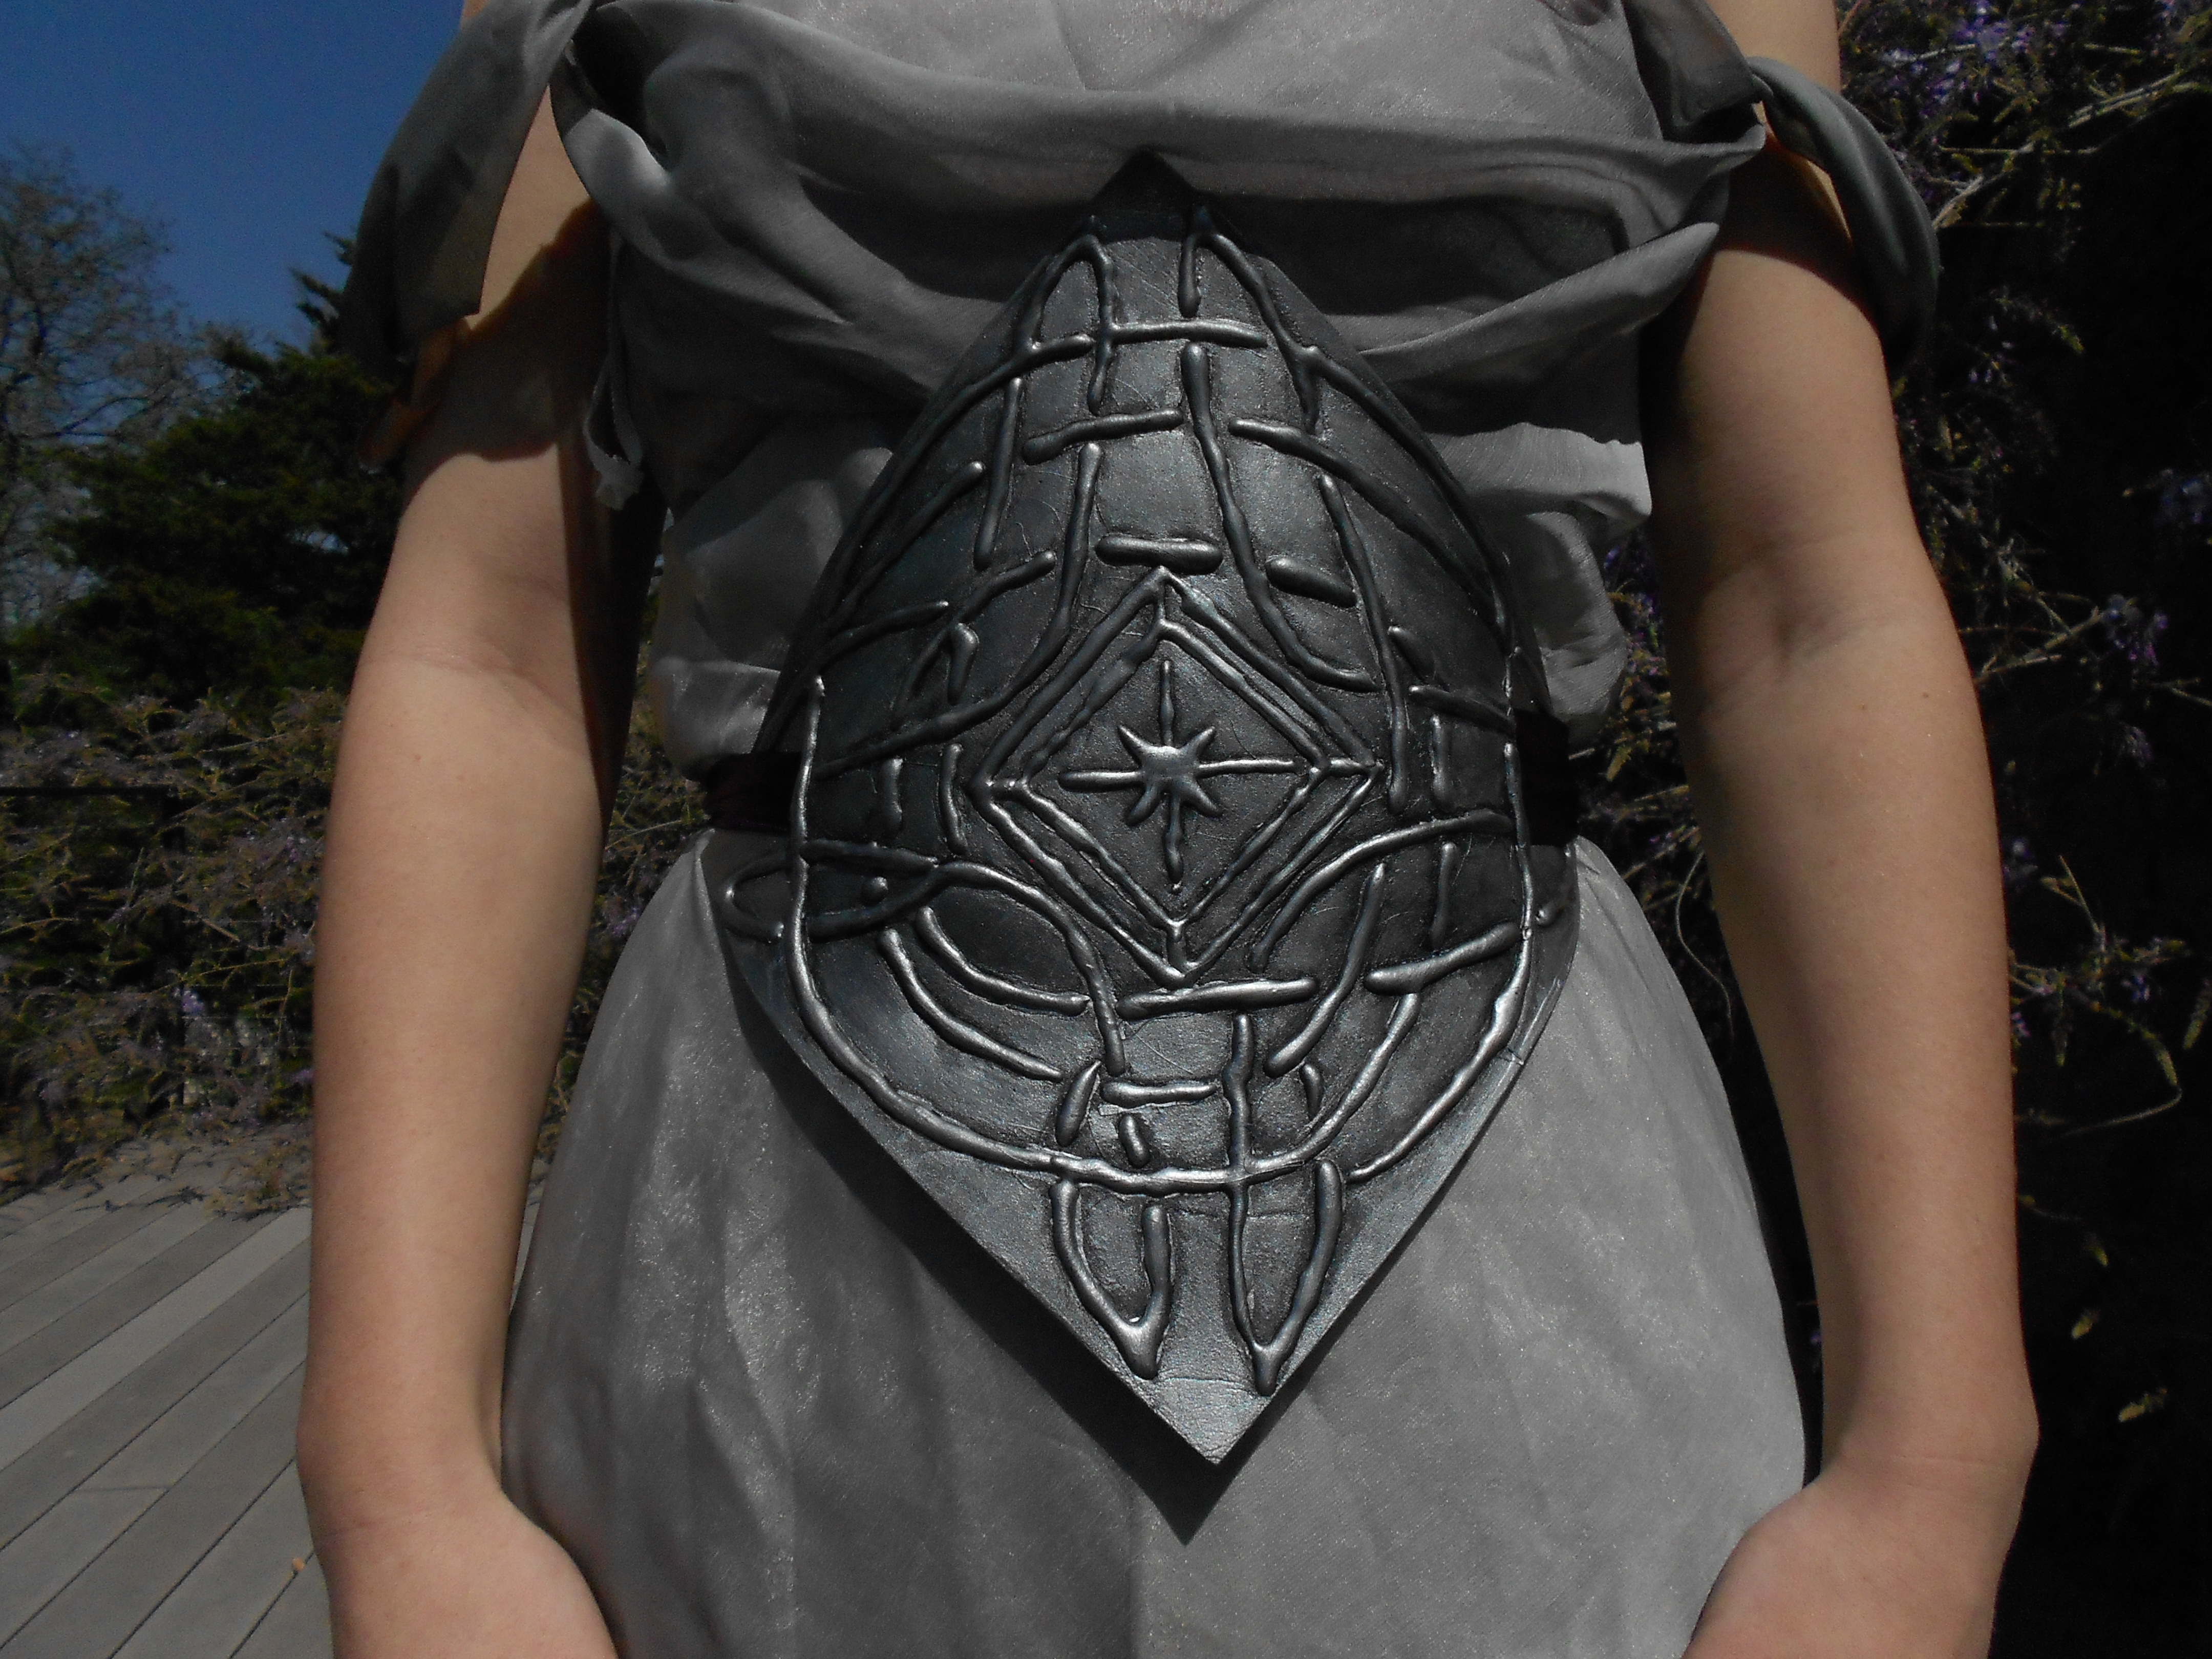
Now you have a beautiful piece of armor that is light and flexible! Congratulations!
If you build a piece from this tutorial I’d love to see it! Feel free to post about it in my comments below!